Prerequisites
Make sure you have set up the Kanda package registry on your computer.
Set up your Unity Project
There are a few prerequisites to using the Kanda SDK in a Unity project
- Your project should be set up using Unity 6000.0 or later.
- Your project must be using Universal Render Pipeline (URP)
- You can for example use the URP 3D Template available in the Unity Hub
- You must have installed Text Mesh Pro essentials package.
- Find it in Window > TextMeshPro > Import TMP Essential Resources
Go ahead and create a new Unity project now, if you haven't already.
1. Add the registry to your Unity project
Before Kanda packages can be discovered, you must open the Package Manager Settings (Edit > Project Settings > Package Manager) and add the Kanda Package Registry as a scoped registry:
2. Install the package
To install the package, open the Package Manager window (Window > Package Manager) and do one of the following:
- Add the Kanda SDK package from My Registries.
- Add the Kanda SDK package by name (io.kanda.sdk).
3. Add .gitignore
The default Unity gitignore file from GitHub does not account for the scene dependency cache generated by the Unity Entities package. Since the Kanda SDK depends on it, you might want to add the following line to your .gitignore:
4. Add .gitattributes
When working with Unity, we often use big, binary files, so it is desirable to have a .gitattributes file. Large assets are best handled with Git LFS. Merge conflicts with Unity asset files can also be handled by the Unity Smart Merge merge tool.
Here is an example:
.gitattributes contents
Project Settings
The Kanda SDK package contains a number of settings that you can customize to your need. To access these settings go to Project Settings > Kanda SDK.
Project Validations
This is important to make sure your local project is setup correctly to work with the Kanda SDK. Use the Fix button to remediate any issues.
Other Project Settings
Cloud
These settings are related to using the Kanda VTP Cloud - please consult with a Kanda developer on this.
Connection
These settings are related to multiplayer settings for hosting and connecting to a session.
Platform
These settings are related to selecting environment and mocking of target device.
Players
Players settings are used to adjust various settings for the players, such as speed and sensitivity.
Unity Services
These settings are related to using the Unity Services for hosting - please consult with a Kanda developer on this.
Setup XR plugin management
To work on XR platforms such as the Meta Quest series, you will need to set up some settings in XR plugin management, see step 1 in this guide.
It is also a good idea to check its validator and deal with any warnings listed, just like you did above.
URP Settings
The Unity Entities Package works best with the Forward+ rendering path. Find this setting in the assets Assets/Settings/URP-Balanced-Renderer & Co.
Post-processing effects are not recommended on mobile VR platforms, so it is desirable to disable post-processing on any of these assets as well, if used on these platforms.
The SDK Assets
The Kanda SDK package includes basic resources to get your project up and running. These resources are found in the Assets folder of the package.
Scenes
The SDK comes with some pre-built scenes that can be used as is, or used as a template to modify to your own needs.
To use the scenes see Using the SDK scenes
Lobby
The Lobby scene is the initial scene that the project should start in. This is from here, the user creates or joins sessions. The Lobby scene should be added to your Build Setting as scene 0.
The LobbyPlayerSetup subscene is responsible for spawning a player in the Lobby scene.
Session
The session scene is responsible joining or hosting a session.
The SessionPlayerSetup subscene is responsible to spawning player entities into the session.
ContentAuthoring
The scenes related to content authoring should just be seen as examples of how to build a content scene.
The ContentAuthoring scene is an empty scene with subscene(s) referencing Entity scenes containing actual content.
MyContent is the scene containing the main contents from the examples. This scene contains network synced objects
MyAdditionalContent is an example of a nested subscene in the MyContent scene.
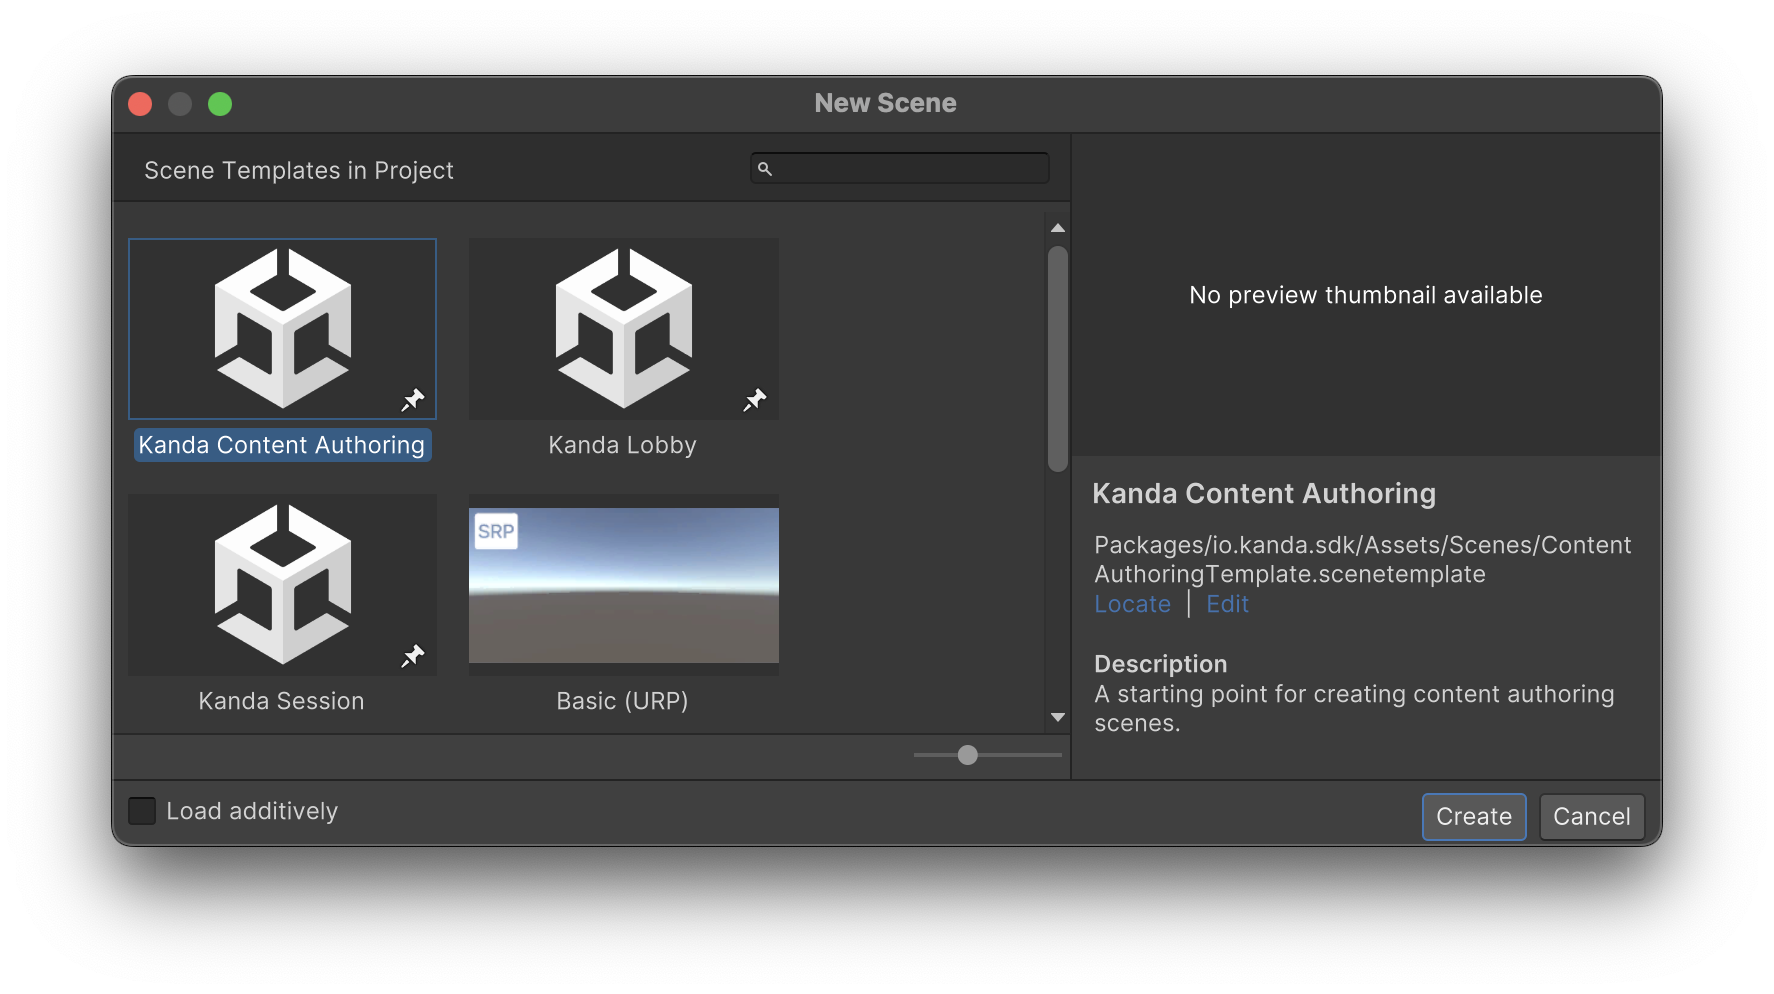
Using the SDK scenes
As scenes in packages are Read-Only, to use the scenes they must exist in your local project.
The Kanda SDK provides a number of scene templates that can be used to clone the scenes to your own project. In Unity, select File > New Scene and follow the on screen dialogue to create your scenes locally.
When you have your scenes locally, add the scenes to your build settings (for you fresh, new project, these will be Lobby, Session and ContentAuthoring). Lobby could be set as the initial scene (index 0) for a good default user flow, but this is not strictly necenssary, and you can also add your own scenes before it if desired.
For App Lifecycle to work correctly, there needs to be scenes in the build settings matching the expected names (default is “Lobby” and “Session”, although these can be configured from settings).
- Note
- When changes are distributed to the templated scenes you might not always get those changes locally if new prefabs are added to those scenes. To get these updates you have to use the
New sceneflow to create new copies of the scene(s) and copy over any changes to your local scene(s).
Test your setup
Once your build settings and scenes are setup with the default SDK scenes and your project is passing project validation, you should be able to start and host a LAN session from the Lobby.
You can quickly test your content in play mode like this.
- Open the "Session" scene
- Additively load the content authoring scene
Extending default SDK assets
Sometimes you want to build something more customized, but at the same time you want to build on top of the examples from the SDK or other lower level packages.
Prefabs
Extending prefabs that lives inside the package is a valid method by using Prefab Variants.
Authoring content
To make custom content, open the content authoring scene and enable the sub-scene with the content itself (You might need to make a new sub-scene, since the ones in the SDK package are read-only.)
As an example, you can try to add authoring components from the Interactions package to some of the entities.